Followers

Monday 7 November 2011

Music saves my soul Saturday/Monday lol

Yes it is Monday but im a little late with my entry this week for Music Saves my Soul Saturday over at Marcea's blog.
After seeing Marcea's post about Steps it got me thinking back to my younger days and I thought id share with you a favourite of mine even though its a little embarassing lol

I loved this song when it was out takes me back to my very late teens early 20's this does.
Hope you like it
Hugs
Marie xxx

More commisssioned Tea Light cards

Thought I would share some more the tea light cards ive been making for a commission order.
These are all birthday ones;


These are more Xmas ones;


Hope you like them
hugs
Marie xxx

Tuesday 1 November 2011

CC Monthy Challenge 18 - Let it Snow

Evening all,
I know I posted pics earlier to show off some examples of what ive been doing lately but I want to enter the CC monthy challenge so I apologise for the repeat of this picture.
Here is my entry for the CC competetion Let it Snow .


I have used CC cute companions Cd rom to print out the back papers, The CC boxer board to make the card and box to hold the tea light candles. The Humphrey stamp on the front is also a CC one I got free with a mag in September. I used my Robo to cut out the larger snowflakes and the smaller ones are an Xcut punch. I have also used some Do Crafts products from the Daisy and Danelion range. The cuttlebug embossing folder is called snowflakes ( ijust love this one especially on the mirror card).
Candy and ribbon both from my stash.
Thanks
Marie xx

Been really busy

Hello everyone, Ive been really busy lately with all my Xmas card/gift orders so havent been blogging for the last few weeks. Although I have been reading everyone else's lol.
I just wanted to show you some examples of what Ive been working on.
I have been making the A5 tea light candle card gifts for my 25 orders but here are just a few to show you.


What do you think?? I thought I liked the contemporary colours best until I made the traditional coloured ones now I like them the best lol
Any comments greatly appreciated 
Hugs
Marie xxx

Sunday 25 September 2011

A5 tea = light card tutorial

Good afternoon everyone. I promised you guys I would share how I made the tea light card that has been featured a lot lately but in the larger size of A5 card.
This is going to be a long post with mutiple pictures. (Apologies for the pictures being upside down it wasnt when I uploaded it but they are appearing on the screen that way not sure why)

I have managed to make this using 3 peices of A4 card stock rather than the specialist 14*14 card stock you would need otherwise.

Firsty place you A4 card stock onto your boxer board (any other scoring board which has inches on it) butt it up using the shorter side and score at 6 inches and again at 7 inches
see picture below

You will need to do this on 2 peices of your card stock.
Cut your card stock at the 7inch score line so your left with this

Do this on both peices
(do not discard these cut off's as you can use them later on)
Fold and burnish your score line and then stick the two folded flaps together to create your card

Now for your box to hold the tea lights.
You will need to cut your longest side at 10 2/8 inch, heigth stays the same (A4


Now score along the shortest edge (longest edge butted up against the edge) and score at
7/8 then 1 6/8 then then 6 6/8 then 7 5/8
turn your card 90 degrees and score at
7/8 then 1 6/8 flip it and do the same the other side
Fold and burnish all your lines it should look something like this

Then cut your ends so they look like this.


What I do next is ink all the edges


You will need to then attach all your backing papers so that its completley covered for when you start to assemble your box.
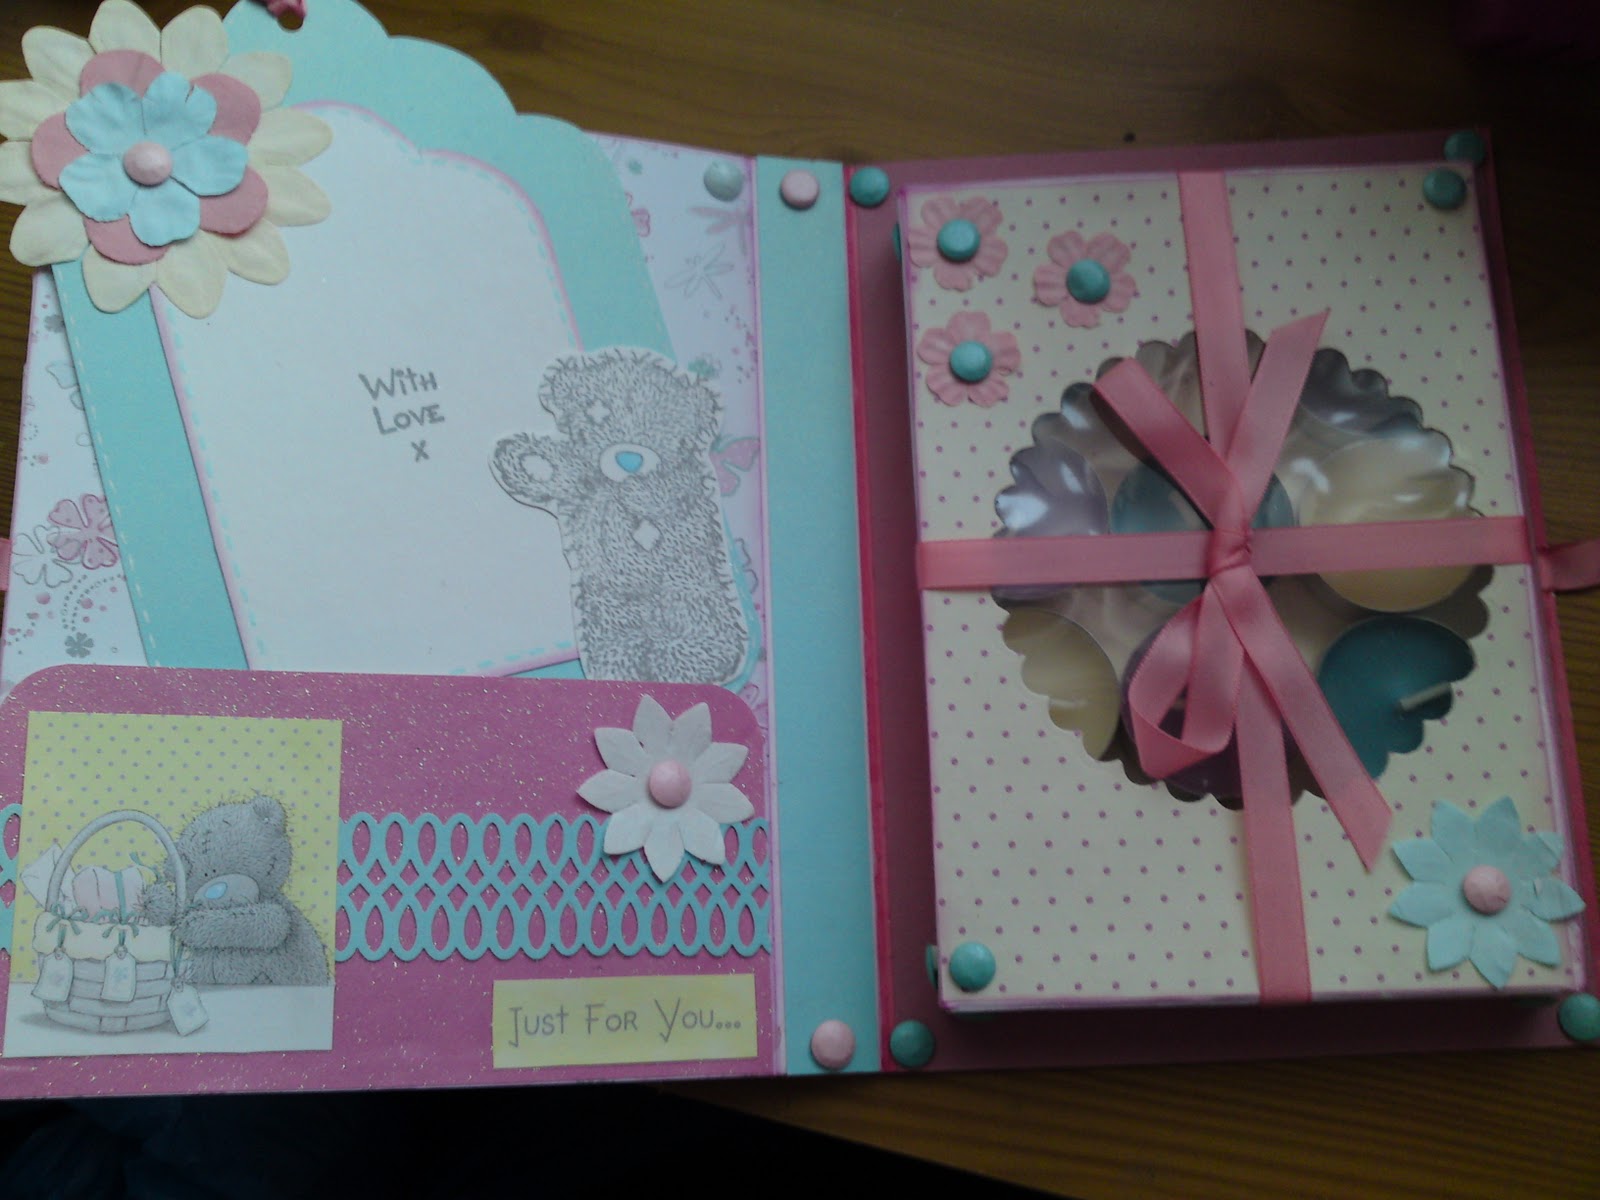
Use a nestie or anything you have to create an aperture on the front of your box then attach ascertate to create the window.

This is one I have completed

Once you ascertate is in place you can asemble your box, you will notice there is no back to it. 
ou can either stick this straight down to your card base or use one of your off cuts from earlier and just slide that into the back of your box to create
a full box (remember it is your choice I do this becuase it gives the box a bit more stablity.
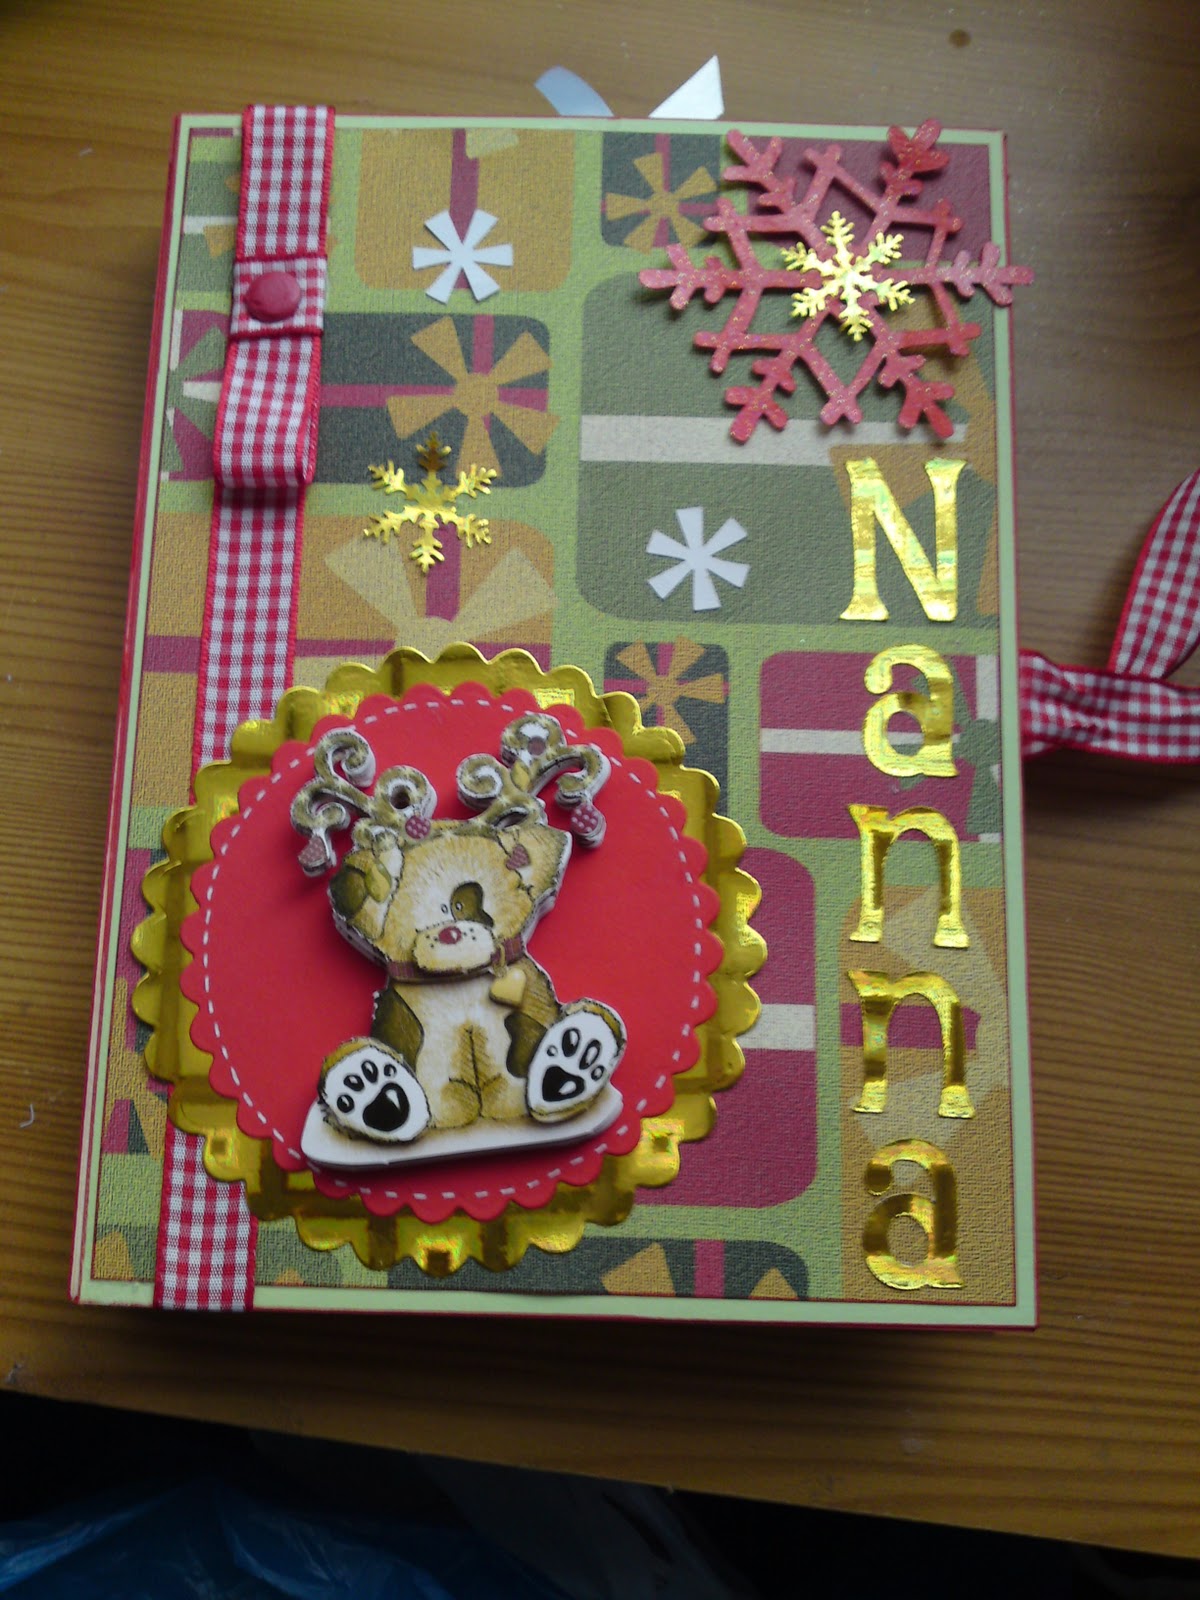
You can decorate your card anyway you like I have made these for both xmas gifts and birthdays. I create a pocket on the inside of the card with a tag so that you can write on the tag but it is entirely up to you how you finish off your very own creation, have fun with it.

Here is a finished example


 A trick I learnt after making a mistake with this is you will need to attach ribbon around your box so that it holds the flap at the top closed keeping your candles safely inside. Do this before you stick it down to the card base. It just means the receipent can access the box easily without having to rip it open and ruin the card in the process.

I hope this is helpful any questions please dont hesitate to ask. It seems lot more complicated than it really is and to actually do your cutting and scoring it only takes about 5 mins, its the decotating and the personal touches that takes all the time.

Hugs
Marie 
xxxx

Tuesday 20 September 2011

A5 tea = light card

Afternoon everyone, After having a go at the Tea light card I saw HERE I decided that I wanted to make a bigger version of this so I could make them as gifts for my daughter's teachers for Christmas.
Here is my take on this,

 It is A5 in size, I have used my free humphrey stamp and coloured it with my promarkers.
 I have used backing papers from the Cute Companions Cd Rom. The sentiment stamp is one of the Daisy and Dandelion christmas stamp sets. I have also used my snowflakes CB embossing folder then ran a ink pad over the top just to highlight the details.


 This is the inside view and I have again used the same backing papers from cute companions cd, this raindeer stamp I got in a Do Crafts goody bag last year but I dont know the name of it. The sentiment stamp is another freebie, it came with my Papercraft insiprations mag this month and is a Forever Freinds stamp set. The snowflake has been cut using my robo and I have layered the same snowflake on the front of the card after colouring them with my promarkers so they matched the stamp.


This is the box I created seperately and then glued to this 1/2 of the card. It holds 12 tea lights and I have left the top open and then tied with ribbon so you can get the candles out easily. I used my Xcut nesties to trace the 'window' and have used asertate. 
If anyone is interested in the dimensions etc for this I will try and get a tutorial step up and posted on here over the next few days. I have manged to work out so you dont need specialist sized card to make this it can all be done using just A4 card stock - takes a lil bit more time and may b a lil bit more fiddly for new crafters but the time is totally worth it I think.

Let me know what you guys think too.
Hugs
Marie xxxx

Wednesday 14 September 2011

50th Birthday card

Afternoon everyong, I made this card yesterday for a order for the same lady as the baby card. I love the colours on this and im really pleased with how its turned out.

 I have used an image out of the Me to You decoupage kit ive had for a while. I have also used some of the papers from the same kit. I love the papers out of this kit there so colourful. I have used a butterfly punch and double layered them to make them 3d with some glaze.


 This is a close up of the decoupage image

I have used my crafters companion number stamps for the numbers and coloured them with my whispers brush markers. I have used some glaze in places on the numbers aswell.

I am entering this into the challenge over and Creative Inspirations - Anything goes

Enjoy the rest of your day
Hugs
Marie xxx

Tuesday 13 September 2011

Baby girl commission card

Evening all.
Just thought I would share with you this baby girl card I made for a commission card a few days back. I havent shared until now as my internet has been playing up again so fingers crossed I get through this post without losing jy connection again.
I have used my decoupage baby images from Pink Gem Desgins which I just love and have used sooooooooooo many times before along with the baby papers that Janet designed to go with these.


 The lady who ordered it asked me to add a picture on the inside of the new baby when she was born but I finished the card and the baby still had not arrived so I decorated the inside for her and sent some photo corners with the card so she can add in the picture once the baby arrives.


This is the inside view again I have used the 'cutie pie' papers from Pink Gem Designs to decorate the inside.
I also made a box to go with this as she wanted it to be a gift and extra special.


I used tissue paper to wrap the card in once it was inside the box.


 I cut up strips of the patterned paper and used this as borders to go around the edge of the box base and just plain pink card to go around the edges of the box lid.


I used my boxer board from Crafters Companion to create the box, i used 2 sheets of A3 card and cut them down to 10x10 inches as my card is 8x8inches. I have cut the patterned paper up again here to make the embelishments on the front and the circle sentiment is from the decoupage sheet.

I am entering this into the challenge over at Creative Card Crew- Babies

I really like how this has turned out and I know I would love to receive it as a gift so I hope they like it.
As always your views and comments are greatly appreciated.
Hugs
Marie xxx